Features and Functionality of Bathroom Wall Mixer 3 in 1
A bathroom wall mixer 3 in 1 is a versatile and functional fixture that combines the convenience of a shower, bathtub, and sink faucet into a single, wall-mounted unit. This innovative design offers a range of features and benefits that enhance the bathroom experience.
After a refreshing shower with the convenience of a bathroom wall mixer 3 in 1, one can retreat to the comfort of their living room, where the walls adorned with wallpaper create a warm and inviting ambiance. The intricate patterns and colors of the wallpaper transport one to a world of imagination, providing a soothing backdrop for relaxation and contemplation.
Returning to the bathroom, the wall mixer 3 in 1 continues to offer its seamless functionality, ensuring a pleasurable and rejuvenating experience.
The wall-mounted design of the mixer provides several advantages. It frees up valuable counter space, creating a more spacious and uncluttered bathroom. The mixer’s placement on the wall also allows for greater flexibility in terms of positioning, enabling users to customize the layout of their bathroom to suit their preferences.
In the realm of compact abodes, every inch counts. The bathroom wall mixer 3 in 1 offers a sleek and space-saving solution for small apartments, where maximizing functionality is paramount. Its minimalist design complements the cozy aesthetics of a tiny home, blending seamlessly with small apartment decor.
The wall-mounted feature frees up valuable floor space, allowing for a more spacious and organized bathroom. The 3-in-1 functionality, combining hot, cold, and shower water in a single unit, enhances convenience and efficiency, making the bathroom wall mixer 3 in 1 an indispensable addition to any small apartment.
Bathroom wall mixers 3 in 1 typically feature a single handle that controls both the water flow and temperature. This ergonomic design simplifies operation, allowing users to easily adjust the water settings with one hand. The handle is often equipped with a ceramic disc cartridge, ensuring smooth and precise control over water flow and temperature.
The spout of the mixer can vary in design, with some models featuring a fixed spout and others offering a pull-out or swivel spout. Pull-out spouts provide greater flexibility and reach, making it easier to fill buckets or clean the sink. Swivel spouts, on the other hand, allow users to direct the water flow in different directions, enhancing convenience and functionality.
Types and Styles of Bathroom Wall Mixer 3 in 1
Bathroom wall mixers 3 in 1 come in a wide range of types and styles to suit different bathroom designs and preferences. They can be classified based on their design, finish, and materials used.
In terms of design, wall mixers 3 in 1 can be categorized into:
Single-Handle Mixers
- Feature a single lever that controls both water temperature and flow rate.
- Offer ease of use and precise water control.
Two-Handle Mixers
- Have separate handles for hot and cold water.
- Provide more precise temperature control but may require more space.
Thermostatic Mixers
- Incorporate a thermostat to maintain a constant water temperature.
- Enhance safety and comfort, especially for families with young children.
Finishes
- Brushed nickel
- Chrome
- Matte black
- Oil-rubbed bronze
Materials
- Brass
- Stainless steel
- Plastic
The latest trends in bathroom wall mixer designs include:
Concealed Mixers
- Have the mixer body hidden behind the wall, leaving only the handles or levers visible.
- Create a sleek and minimalist look.
Smart Mixers
- Incorporate technology that allows for hands-free operation, temperature control, and water flow adjustment.
- Enhance convenience and hygiene.
Water-Saving Mixers
- Feature aerators or flow restrictors to reduce water consumption.
- Promote environmental sustainability.
Installation and Maintenance of Bathroom Wall Mixer 3 in 1
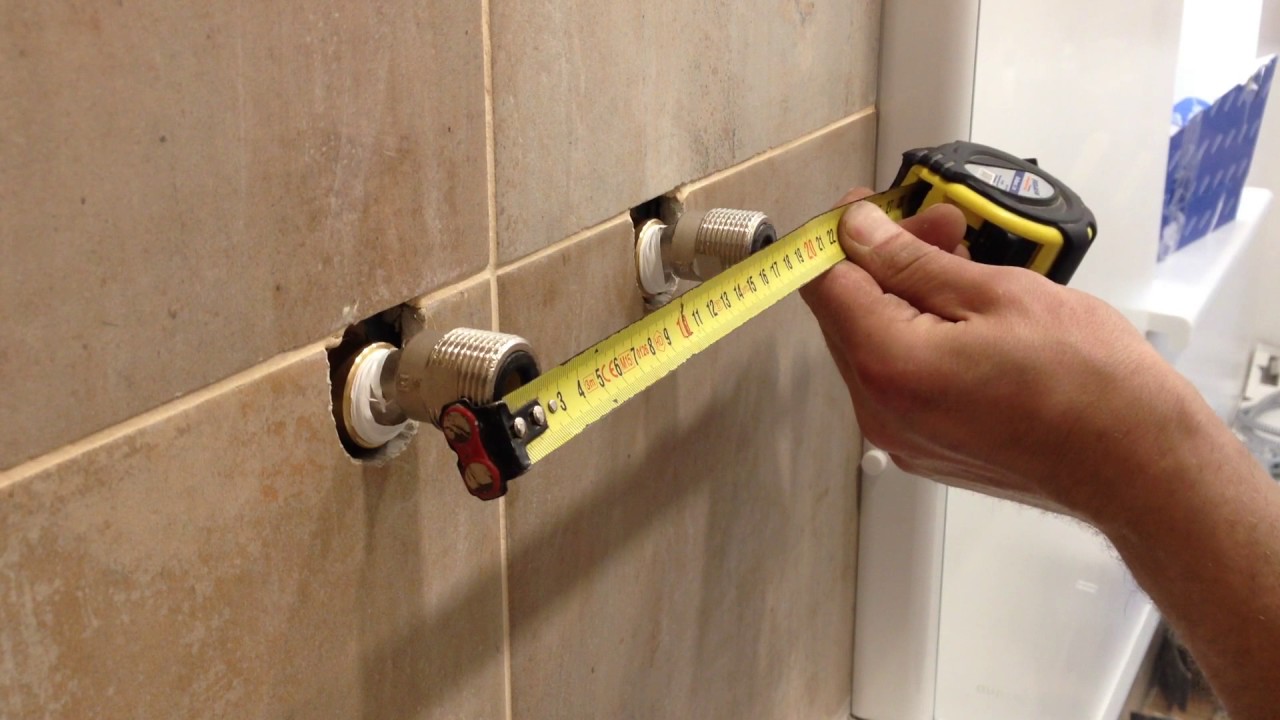
Installing and maintaining a bathroom wall mixer 3 in 1 is a relatively straightforward task that can be completed by most homeowners with basic plumbing skills. By following the steps Artikeld below, you can ensure that your mixer is installed correctly and will provide years of trouble-free service.
Before beginning the installation process, it is important to gather all of the necessary tools and materials. These include:
- Bathroom wall mixer 3 in 1
- Wrench
- Pliers
- Screwdriver
- Teflon tape
- Plumber’s putty
Once you have gathered all of the necessary tools and materials, you can begin the installation process. The following steps will guide you through the process:
Step 1: Shut off the water supply, Bathroom wall mixer 3 in 1
The first step is to shut off the water supply to your bathroom. This can be done by turning off the main water valve or by closing the shut-off valves under the sink.
Step 2: Remove the old mixer
Once the water supply is shut off, you can remove the old mixer. To do this, simply unscrew the nuts that hold the mixer in place. Once the nuts are loose, you can pull the mixer away from the wall.
Step 3: Install the new mixer
Now you can install the new mixer. To do this, first apply a bead of plumber’s putty to the back of the mixer. Then, insert the mixer into the hole in the wall and tighten the nuts that hold it in place.
Step 4: Connect the water supply lines
Once the mixer is installed, you can connect the water supply lines. To do this, simply screw the water supply lines onto the mixer. Make sure to use Teflon tape on the threads to prevent leaks.
Step 5: Turn on the water supply
Once the water supply lines are connected, you can turn on the water supply. Check for leaks around the mixer. If you find any leaks, tighten the nuts that hold the mixer in place.
Maintenance
To ensure that your bathroom wall mixer 3 in 1 lasts for many years, it is important to maintain it properly. This includes cleaning the mixer regularly and checking for leaks. To clean the mixer, simply wipe it down with a damp cloth. To check for leaks, simply turn on the water and look for any water dripping from the mixer.
